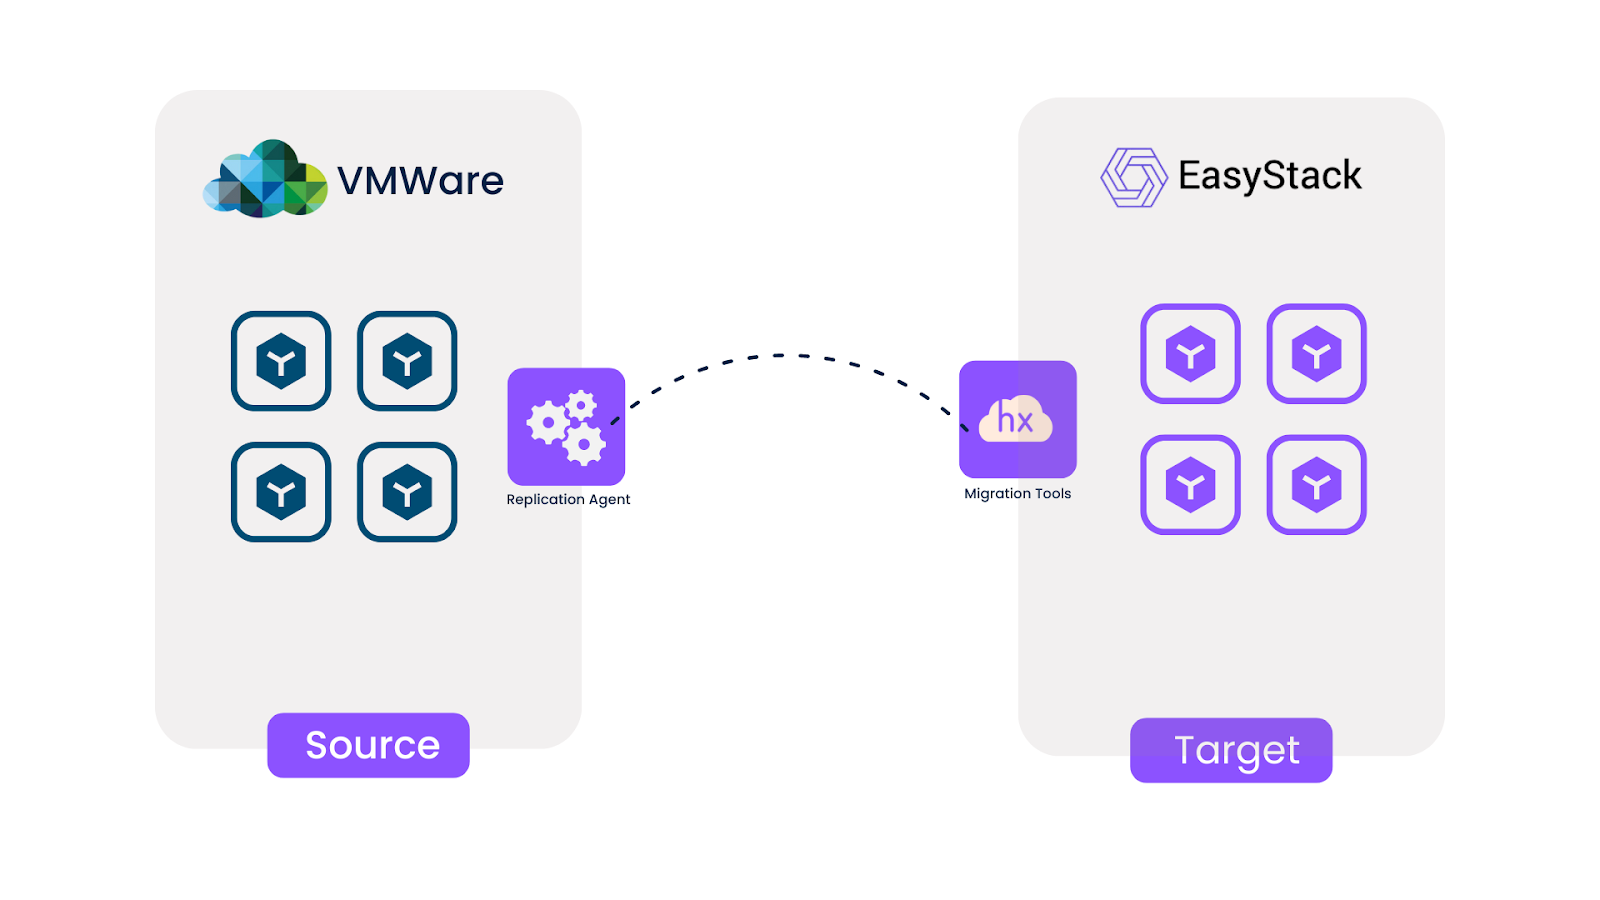
In this article, we will show you an overview of how to migrate from VMware to Easystack. The migration process is quite simple. We have previously installed migration tools on the Easystack Environment. Then we will also install the agent on both sides (VMWare and Easystack). Create replication data of the VM and then, the VM will be migrated. It is quite easy, right?
Here are the more detail information about the migration process:
1. Download the agent.
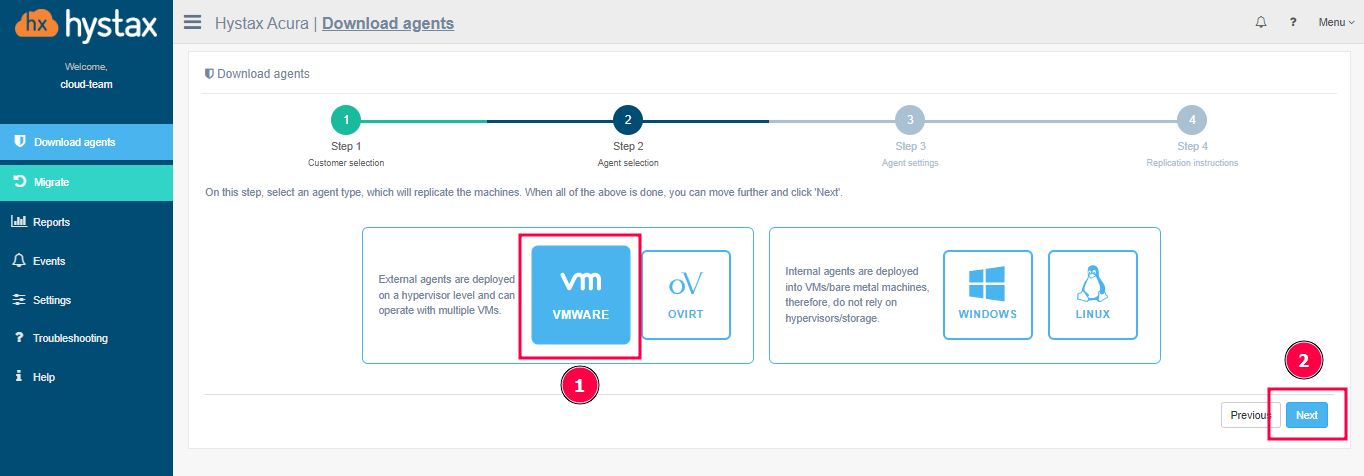
First of all, you need to choose the type of agent. This migration tool offers two types of agents: External Agent and Internal Agent. External agents are deployed on a hypervisor level and can operate with multiple VMs. And then Internal agents are deployed into VMs/bare metal machines. In this example, we show you how to use the external agent. In the process, you need to enter the VMware login information and configure the network settings for the agent. After that, you can download the image of the agent.
2. Create a VM using the Agent image that you downloaded earlier.
In the picture below, we have succesfully created the vm with the agent image.
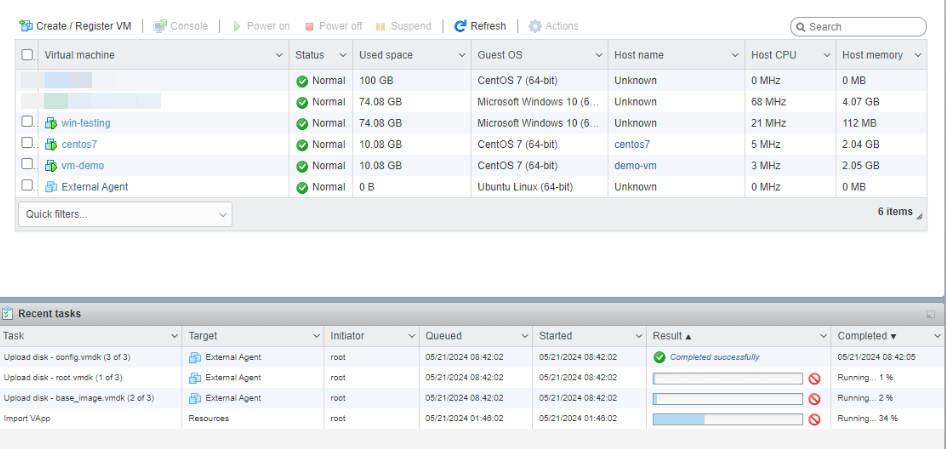
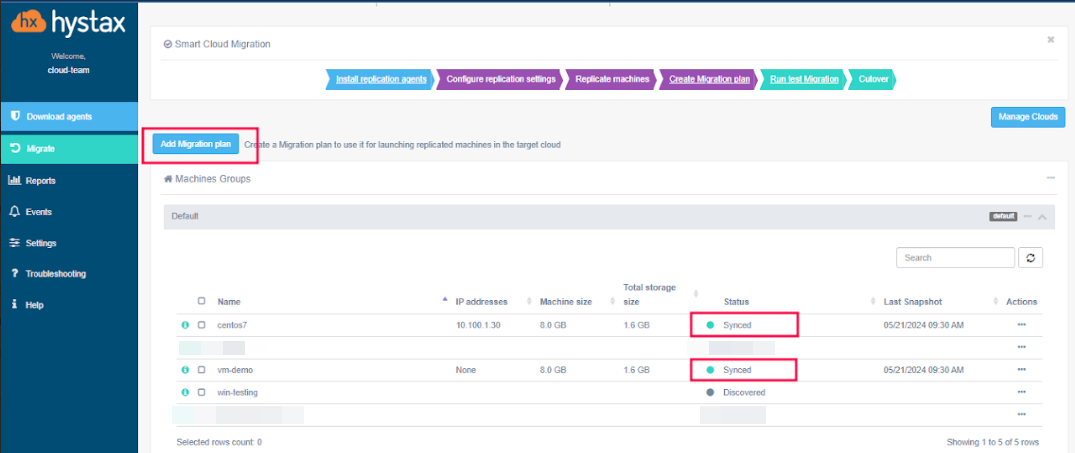
If the Agent is installed correctly, you will see all VMs detected with the status "Discovered" on the migration tools dashboard.
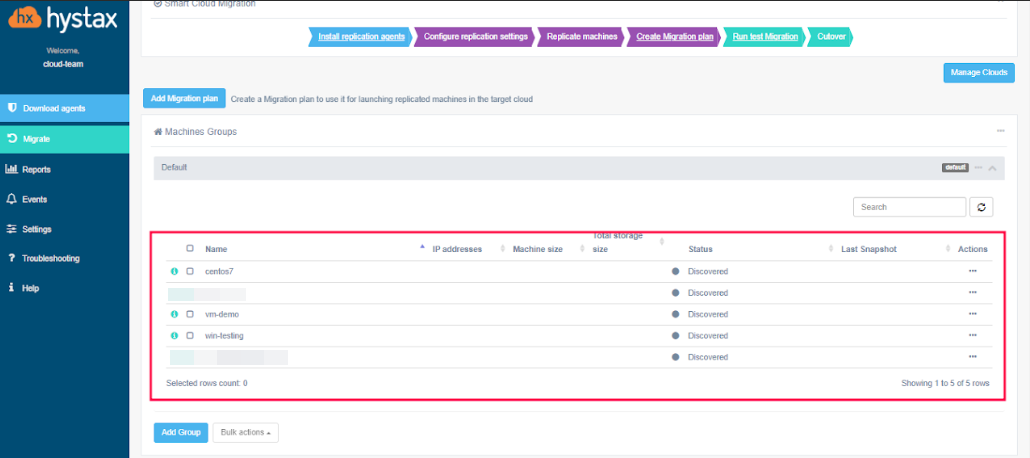
3. After all vm are detected, select the VM you want to migrate to EasyStack and start data replication.
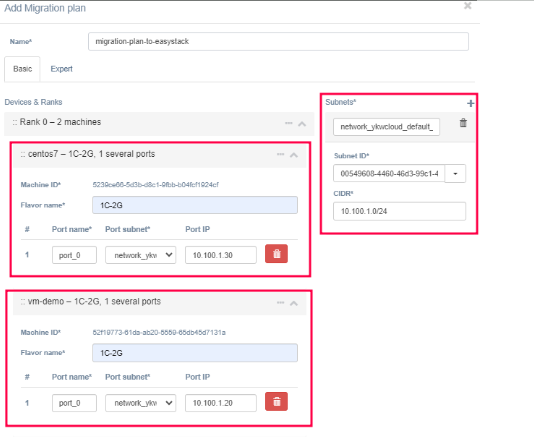
4. If the data has been synced, then you can create a Migration Plan.
5. In the migration plan you need to setup networks and flavor of the virtual machines after that you can run migrate.
6. Once the process is complete, the cloud site status will change to "running" and the VM in EasyStack will change to "active"
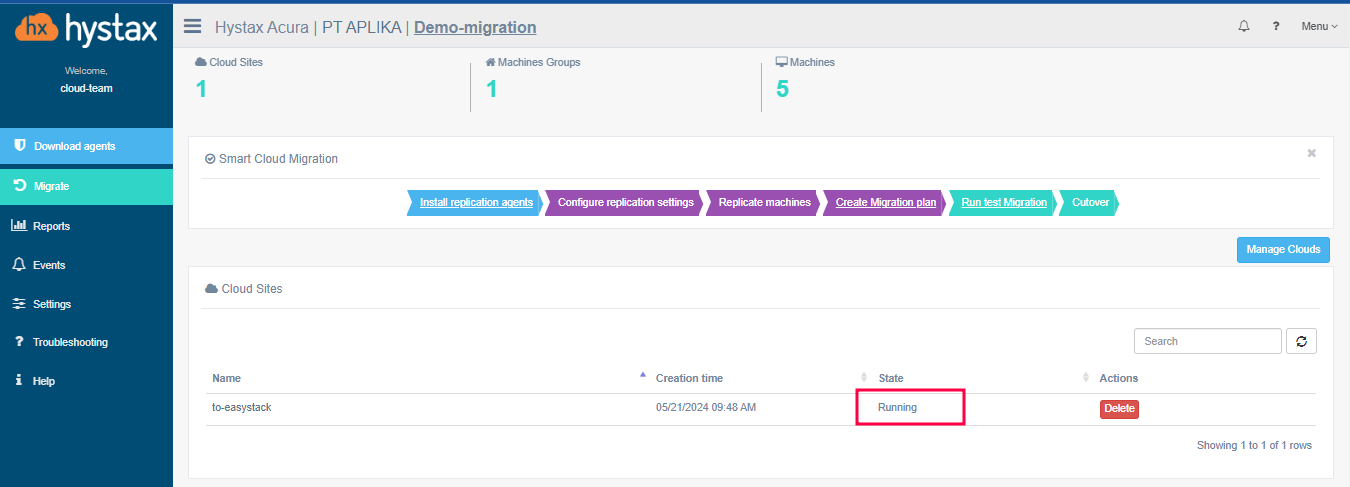
7. Finally, the VMs have been successfully migrated to EasyStack.

20 McCallum Street, #19-01, Tokio Marine Centre
Singapore 069046
Phone: +65 82900954
Grand Slipi Tower Level 42G-H
JI. S. Parman Kav 22-24, Slipi Jakarta 11480
Phone: +62 813-1601-9491 (WA)